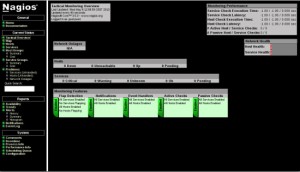
Thanks to guys from Centos.alt.ru CentALT RPM Repository you can now install Nagios 3.5.0 RPM on CentOS. Nagios 3.5.0 RPM is available in their repository so all you need to do is add their CentALT and EPEL repo to your servers and run “yum install nagios”! Here is a Step-by-Step guide on how to get Nagios 3.5.0 running on your server with YUM and RPM. I am installing Nagios 3.5.0 RPM on fully updated freshly installed CentOS 6.4 32bit minimal!

UPDATE: Jump to the latest post on Nagios – Running Nagios Core 4.1.1. on CentOS 7
Let’s start our Nagios 3.5.0 RPM install guide!
1. Install repositories
Install EPEL and CentALT repository (check if there is a newer version of both repositories available!):
[root@foo ~]# rpm -ivh http://ftp-stud.hs-esslingen.de/pub/epel/6/i386/epel-release-6-8.noarch.rpm
[root@foo ~]# rpm -ivh http://centos.alt.ru/repository/centos/6/x86_64/centalt-release-6-1.noarch.rpm
2. Check for available Nagios versions
You can check which version of Nagios is available with new additional repositories – i can see Version:3.5.0:
[root@foo ~]# yum info nagios
Loaded plugins: fastestmirror
Loading mirror speeds from cached hostfile
* base: ftp.arnes.si
* epel: mirror.karneval.cz
* extras: ftp.arnes.si
* updates: ftp.arnes.si
Available Packages
Name : nagios
Arch : i686
Version : 3.5.0
Release : 1.el6
Size : 935 k
Repo : CentALT
Summary : Nagios monitors hosts and services and yells if somethings breaks
URL : http://www.nagios.org/
License : GPLv2
3. Install Nagios packages
Install nagios, nagios-plugins and php with dependencies:
[root@foo ~]# yum install nagios nagios-plugins-all php
4. Link Nagios HTML files
Nagios HTML files are by default installed at location /usr/share/nagios/html/ but Apache is only serving HTML from location /var/www/html. I created a Symlink, you can solve the problem your way:
[root@foo ~]# ln -s /usr/share/nagios/html/ /var/www/html/nagios
5. Edit Nagios Apache configuration file
Edit the /etc/httpd/conf.d/nagios.conf file and allow acces to /usr/share/nagios/html/ directory and change Options to +Indexes:
*Directory /usr/share/nagios/html/*
Options +Indexes
order deny,allow
# deny from all
allow from all
AuthType Basic
AuthUserFile /etc/nagios/passwd
AuthName "nagios"
require valid-user
*Directory*
6. Create Nagios user
Create a Nagios user and set a password:
[root@foo ~]# htpasswd -s -c /etc/nagios/passwd geekpeek
New password:
Re-type new password:
Adding password for user geekpeek
7. Check Nagios configuration and start
Check Nagios configuration and start Nagios and Apache:
[root@foo ~]# /usr/sbin/nagios -v /etc/nagios/nagios.cfg
[root@foo ~]# service nagios start
[root@foo ~]# service httpd start
This is the end of Nagios RPM install guide. Point your browser to your server hostname or IP address http://hostname.domainname.com/nagios or http://IPADDRES/nagios and enjoy your Nagios! 🙂
Of course now you have to configure Nagios – additional hosts, services, contacts,…. You can read more on this in my Nagios configuration post!
Pingback: Pnp4Nagios CentOS install()